STEP ELEVEN
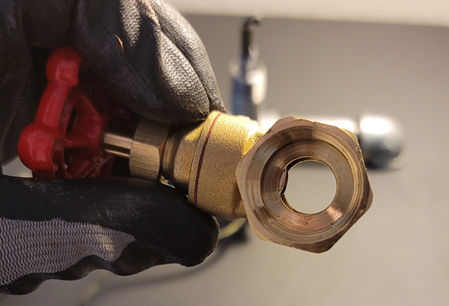
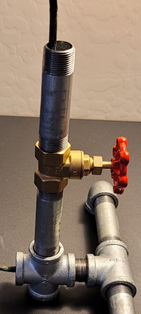
Attach the gate valve. When you purchase the gate valve, make sure you get the kind that opens fully on the inside. Some models have a crook on the inside which makes it very difficult to get the lamp cable through. It also puts stress on the cable which could eventually cause it short out. We also want the ½’ plastic tubing to fit through the valve comfortably when it is open. The purpose of the plastic tubing is to protect the cable from the pinching of the lamp cord when someone inevitably tries to turn the knob on the valve thinking it will dim the light or turn it on and off.
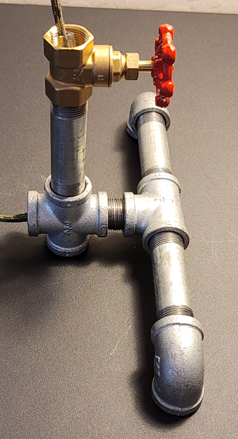
With the gate valve fully open, fish the cable with the surrounding plastic tube through the opening, then screw the gate valve onto the 4” pipe and hand tighten. Be sure the lamp cord is sticking out enough to grab hold of it if you need to pull more slack. When you are finished tightening the gate valve be sure to leave the knob facing forward toward the Tee
STEP TWELVE
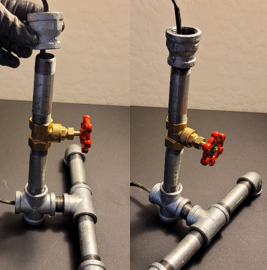
Insert the remaining 4” pipe over the cable and connect it into the gate valve. Leave 4” to 6” of slack above the opening of the pipe. Wearing your gloves, tighten the 4” pipe into the top of the gate valve.
STEP THIRTEEN
Attach the 1” to ¾” reducer coupler to the 4” pipe and hand tighten as shown. These couplers usually have ridges on the sides to accommodate pipe wrenches, make sure these ridges are aligned in an aesthetic fashion left to right.
STEP FOURTEEN
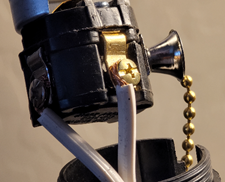
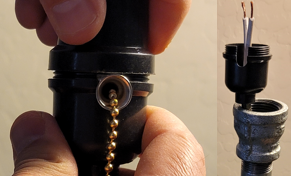
Detach the bottom of the lamp socket housing and slide the end of the lamp cord through, then remove the tape from the end of the lamp cord.
STEP FIFTEEN
Connect the lamp cord to the electrical part of the lamp socket. This step is very critical for safety reasons and if you don’t understand electricity, please don’t attempt this without supervision from someone who does. You could get electrocuted or cause a fire if this is connected incorrectly. Also, this step is only valid in the United States where the 110V AC standard is used. Most lamps use ungrounded cables these days, meaning the ground is carried in one of the two wires instead of a third separate wire.
DO NOT USE A LAMP SOCKET THAT DOES NOT HAVE A PLASTIC HOUSING AROUND THE ELECTRICAL PARTS!!!!
Modern U.S. electrical wiring is connected in a way that there is a “hot” connection and a “ground” or neutral connection. In older equipment, electrical cables had a separate third wire that attached to ground. Ungrounded cables are polarized in a way that only allows you to plug them into the electrical socket the correct way. However, this only works correctly if electrical appliances are wired internally correctly. The grounded side of the plug is the larger of the two connectors. Ground(neutral) wires are usually marked in some way with a ridge on the plastic shielding. If you are lucky, the two wires will be color coded black and white or black and red. In this case the black wire would be the ground. In any case, the ground wire needs to be attached to the electrical connector on the lamp socket that is electrically connected to the outside housing that the bulb screws into. The “hot” wire will attach to the connector that is attached electrically to the inside bottom of the lamp socket.
Wrap the wires around the corresponding connector screws and tighten them down with a screw driver. Most lamp cord wires are braided, so make sure not to tighten them down in a way that they are squeezed out from under the screws and touching some other part of the socket.