
Powershell – Customizing Gridview
The Powershell Out-GridView commandlet is a very useful visual aid for Powershell coders to get output into a graphical window for quickly viewing and sorting data retrieved from Powershell commands. It’s out-of-the-box functionality is somewhat limited however, so in this post I will show how to customize some of the output to make it more useful.
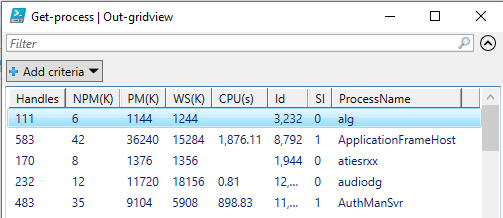
The Out-GridView command simply takes output from a Powershell command and pipes it to a spreadsheet-like window. For instance if you type the command:
Get-process | Out-GridView
You will get something like this:
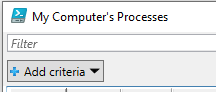
Lets start by updating the Title of the Gridview window. We do this with the Title option: Get-process | Out-GridView -Title “My Computer’s Processes” Now the Title looks a little more professional:
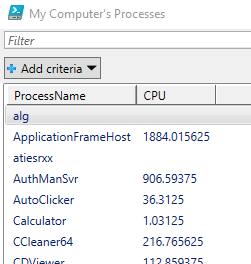
Next let’s change the column names to be more useful. Some people may not know what NPM(K) means. We can change the column names by using the SELECT Statement similar to SQL along with the Expression command. The SELECT Statement tells Powershell which columns of data you want to present to Gridview. For instance let’s say you only want to see the ProcessName and CPU cycles. You would use this command:
Get-process | SELECT ProcessName,CPU | Out-GridView
Then you would get the following:
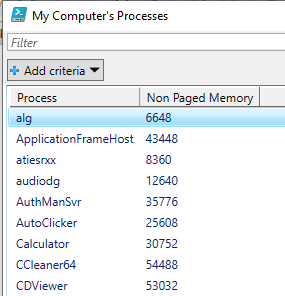
If you want to change the name of one or more columns you would use the SELECT command along with the Expressions command. For instance maybe you want to change “ProcessName” to just “Process” and “NPM(k)” to “Non-Paged Memory”. You would do so in the following way using the SELECT command along with expression:
Get-Process | SELECT @{Name="Process";Expression={$_.ProcessName}}, @{Name="Non Paged Memory"; Expression={$_.NPM}} | Out-GridView
This gives you a much cleaner looking Gridview:
Next we’ll add some rounding to the CPU column to clean up the numbers, we probably don’t need to know the numbers down to the 1/100,000.
We do this by adding the [MATH::ROUND] Command along with a number telling Powershell how many decimals to round to. In our case we will use “0” to round to the nearest whole number:
@{Name=”CPU”; Expression={[math]::round( $_.CPU , 0 )}}
Our output now looks like this:
But if we’re troubleshooting a performance issue we may want to sort by memory or CPU. You can do this in Gridview by simply clicking the column headers, however you can also do it in the script. You must sort the data however, before it is presented to the Gridview. You do this by piping the data to the Sort-Object command:
Sort-object CPU -Descending
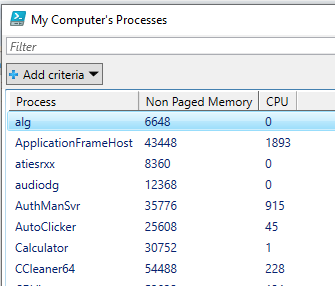
Here’s the entire line of code we’ve built so far:
Get-Process | SELECT @{Name="Process";Expression={$_.ProcessName}}, @{Name="Non Paged Memory"; Expression={$_.NPM}}, @{Name="CPU"; Expression={[math]::round( $_.CPU,0 )}} | Sort-object CPU -Descending | Out-GridView -Title "My Computer's Processes"
Now let’s say you want to do something useful with the data in the Gridview. You can select rows in the grid and pass the data through to another command using the passthrough command. You must assign the output of the Get command to a variable and then use the passthrough option of Out-GridView like so:
$SELECTION = Get-Process | Out-GridView -passthrough
This allows you to highlight one or multiple rows using your mouse and the CTRL key and once you click ok on your Gridview window, Powershell will pass the data in your selection to the variable you assigned where it can be parsed and used in the next command in your script.
Let’s start fresh with a new example so we can use the -passthrough option and also highlight some other things you can do with the Gridview window. We will build on what we learned so far.
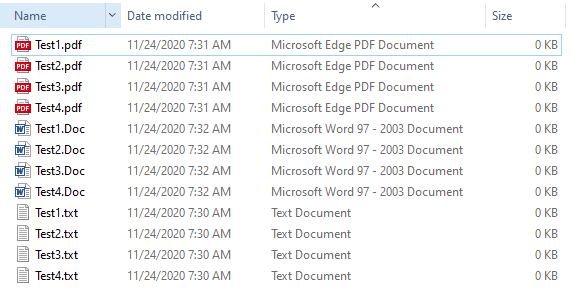
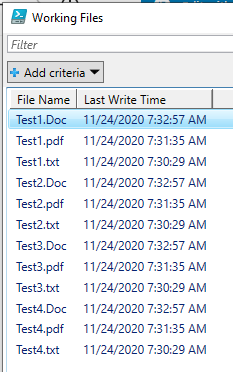
In this example, I have a set of files of different types in a folder. I’m going to use the Get-childitem command to get a list of those files and then add a new column with custom data in it for sorting the file types. Here is a look at the files in the folder:
If we assign the file path to a variable and then do a Get-childitem using that variable and output to Gridview we will get something like this:
$FILEPATH = "C:\TEMP"
Set-Location -Path $FILEPATH
Get-childitem $FILEPATH | Out-GridView
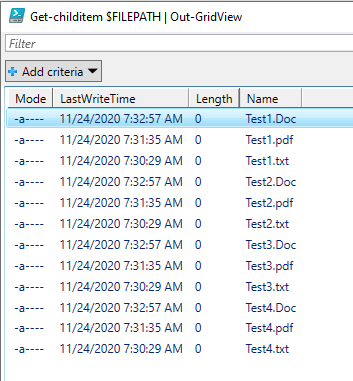
I went ahead and added another line of code Set-Location -Path $FILEPATH. This will set the working directory of the script to the folder we are interested in. You’ll see why later.
We’ll use the knowledge we gained earlier in this post and cleanup the column names using our Expression command from earlier add a window title and put the columns in a more comfortable order:
$FILEPATH = "C:\TEMP"
Set-Location -Path $FILEPATH
Get-childitem $FILEPATH | Select @{Name="File Name";Expression={$_.Name}}, @{Name="Last Write Time";Expression={$_.LastWriteTime}}| Out-GridView -Title "Working Files"
This will give you a window like this:
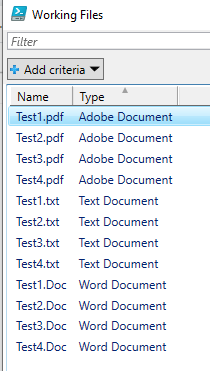
It looks good, but what if you wanted to sort by file type. File type is not an available data field returned by the Get-childitem command. What we can do is extend our Expression command to use an if statement and create a new column which contains the file type.
$FILEPATH = "C:\TEMP"
Set-Location -Path $FILEPATH
$FILES= Get-childitem $FILEPATH |
SELECT Name, @{Name="Type";
Expression={
if($_.name -like '*.doc') {"Word Document"}
if($_.name -like '*.txt') {"Text Document"}
if($_.name -like '*.pdf') {"Adobe Document"}
}
} | Out-GridView -title "Working Files"
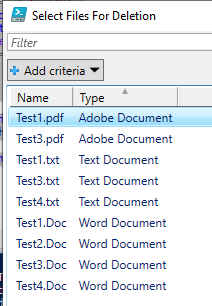
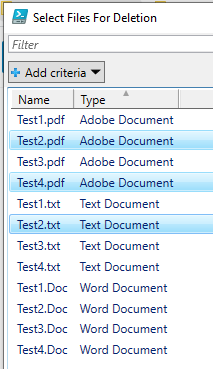
That’s all fine and dandy, but what if want to do something useful with the files returned, like deleting them? That’s where the passthrough command comes in. We will add the rest of the code to pass the information selected through to a variable and use the foreach command along with the remove-item command to delete the files selected. We’ll also update the title to something more appropriate. Here is the complete code:
$FILEPATH = "C:\TEMP"
Set-Location -Path $FILEPATH
$FILES= Get-childitem $FILEPATH |
SELECT Name, @{Name="Type";
Expression={
if($_.name -like '.doc') {"Word Document"} if($_.name -like '.txt') {"Text Document"}
if($_.name -like '*.pdf') {"Adobe Document"}
}
} | Out-GridView -PassThru -Title "Select Files For Deletion"
Foreach ($SELECTION in $FILES)
{
Remove-Item $SELECTION.name
}
Now when you highlight the files and click ok, they will be deleted:
I clicked Ok and ran the script again and as you can see the files are gone:

In a later post I will explain how to put an “Are You Sure” button in your delete command.